5 Useful Tips for Picking Out the Perfect Wedding Cake

Beginning of every good thing in life has to start with something delicious and beautiful. And, the beginning of a romantic relationship is one of the most important things. Choosing the perfect wedding cake holds significance as it remains the centre of attraction of the event. Icinginks explains 5 useful tips to help you pick the right wedding cake.

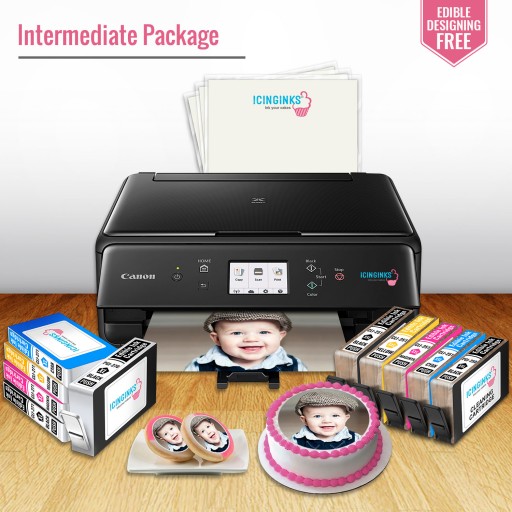
1. Find your bakerCreate a list of professional bakers of your area or city. If you are new to the place or a baker, take help of business directories like Sulekha and Yelp to find bakers with a good reputation. Instagram and Facebook are also great platforms where you can find businesses promoting their cake designs. Reviews available there, or on Google, Trustpilot, etc., can be helpful in zeroing in on the right baker. However, if you love the cake making art, edible supplies from Icinginks are at your disposal.

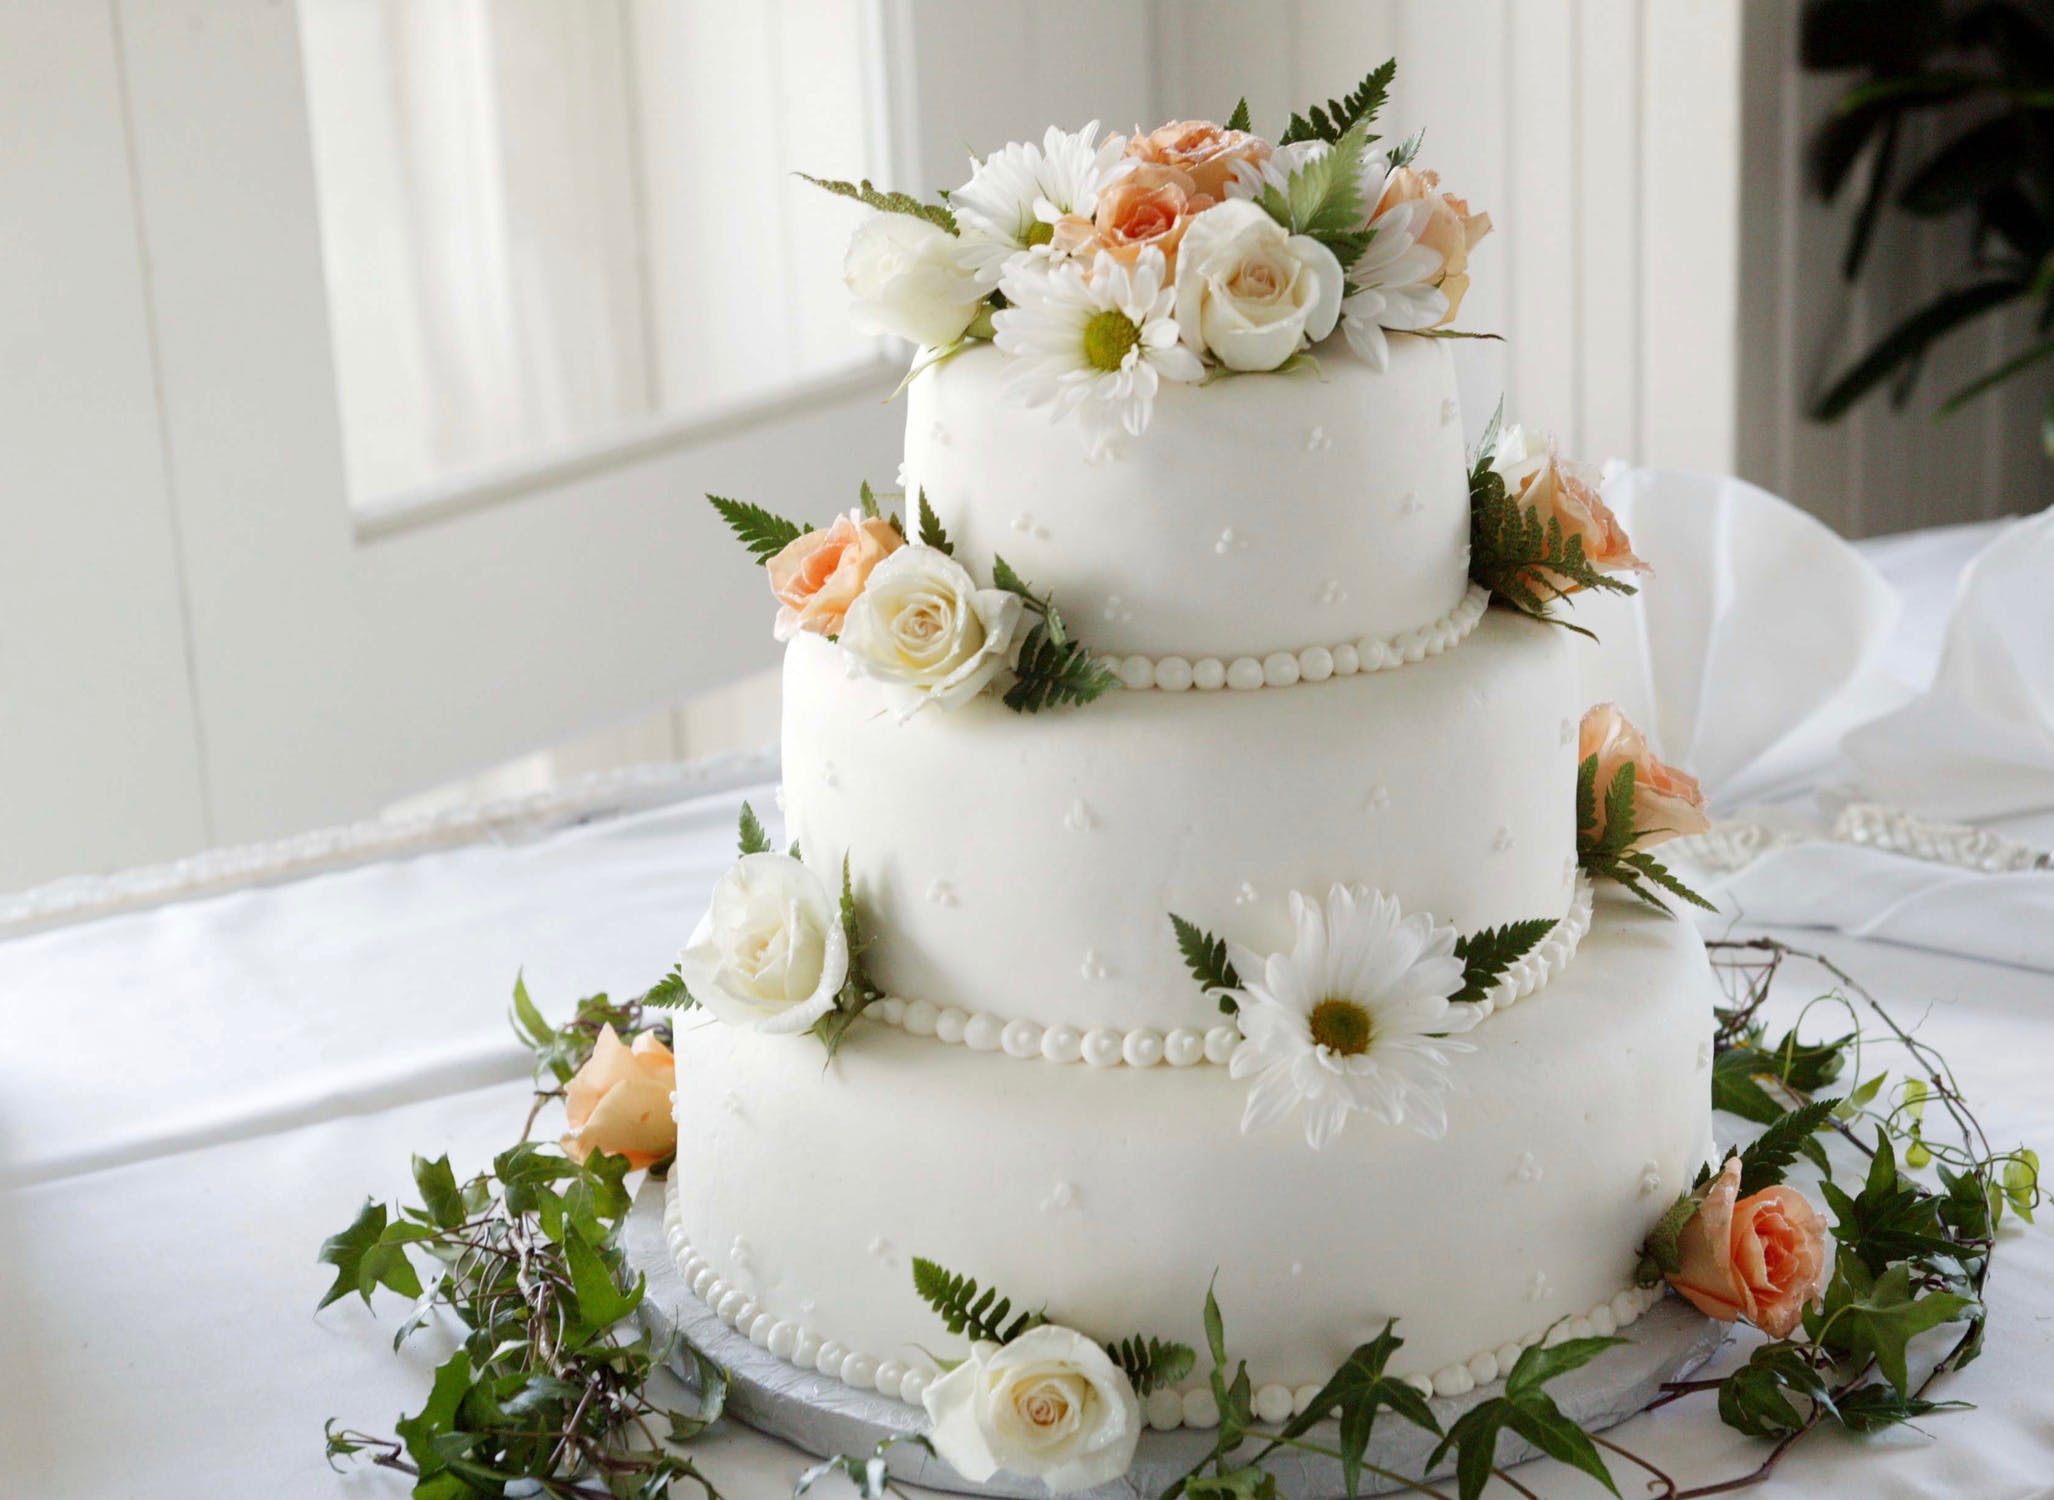
2. Choose a style or themeThough wedding itself is the biggest theme, to stand out, think of ways to make it unique. Browse YouTube to know from experts. Royal wedding cakes can be inspirational too. 

Stylish Theme Wedding Cake

Source: https://www.instagram.com/p/-dGGPZLpXW/?utm_source=ig_embed
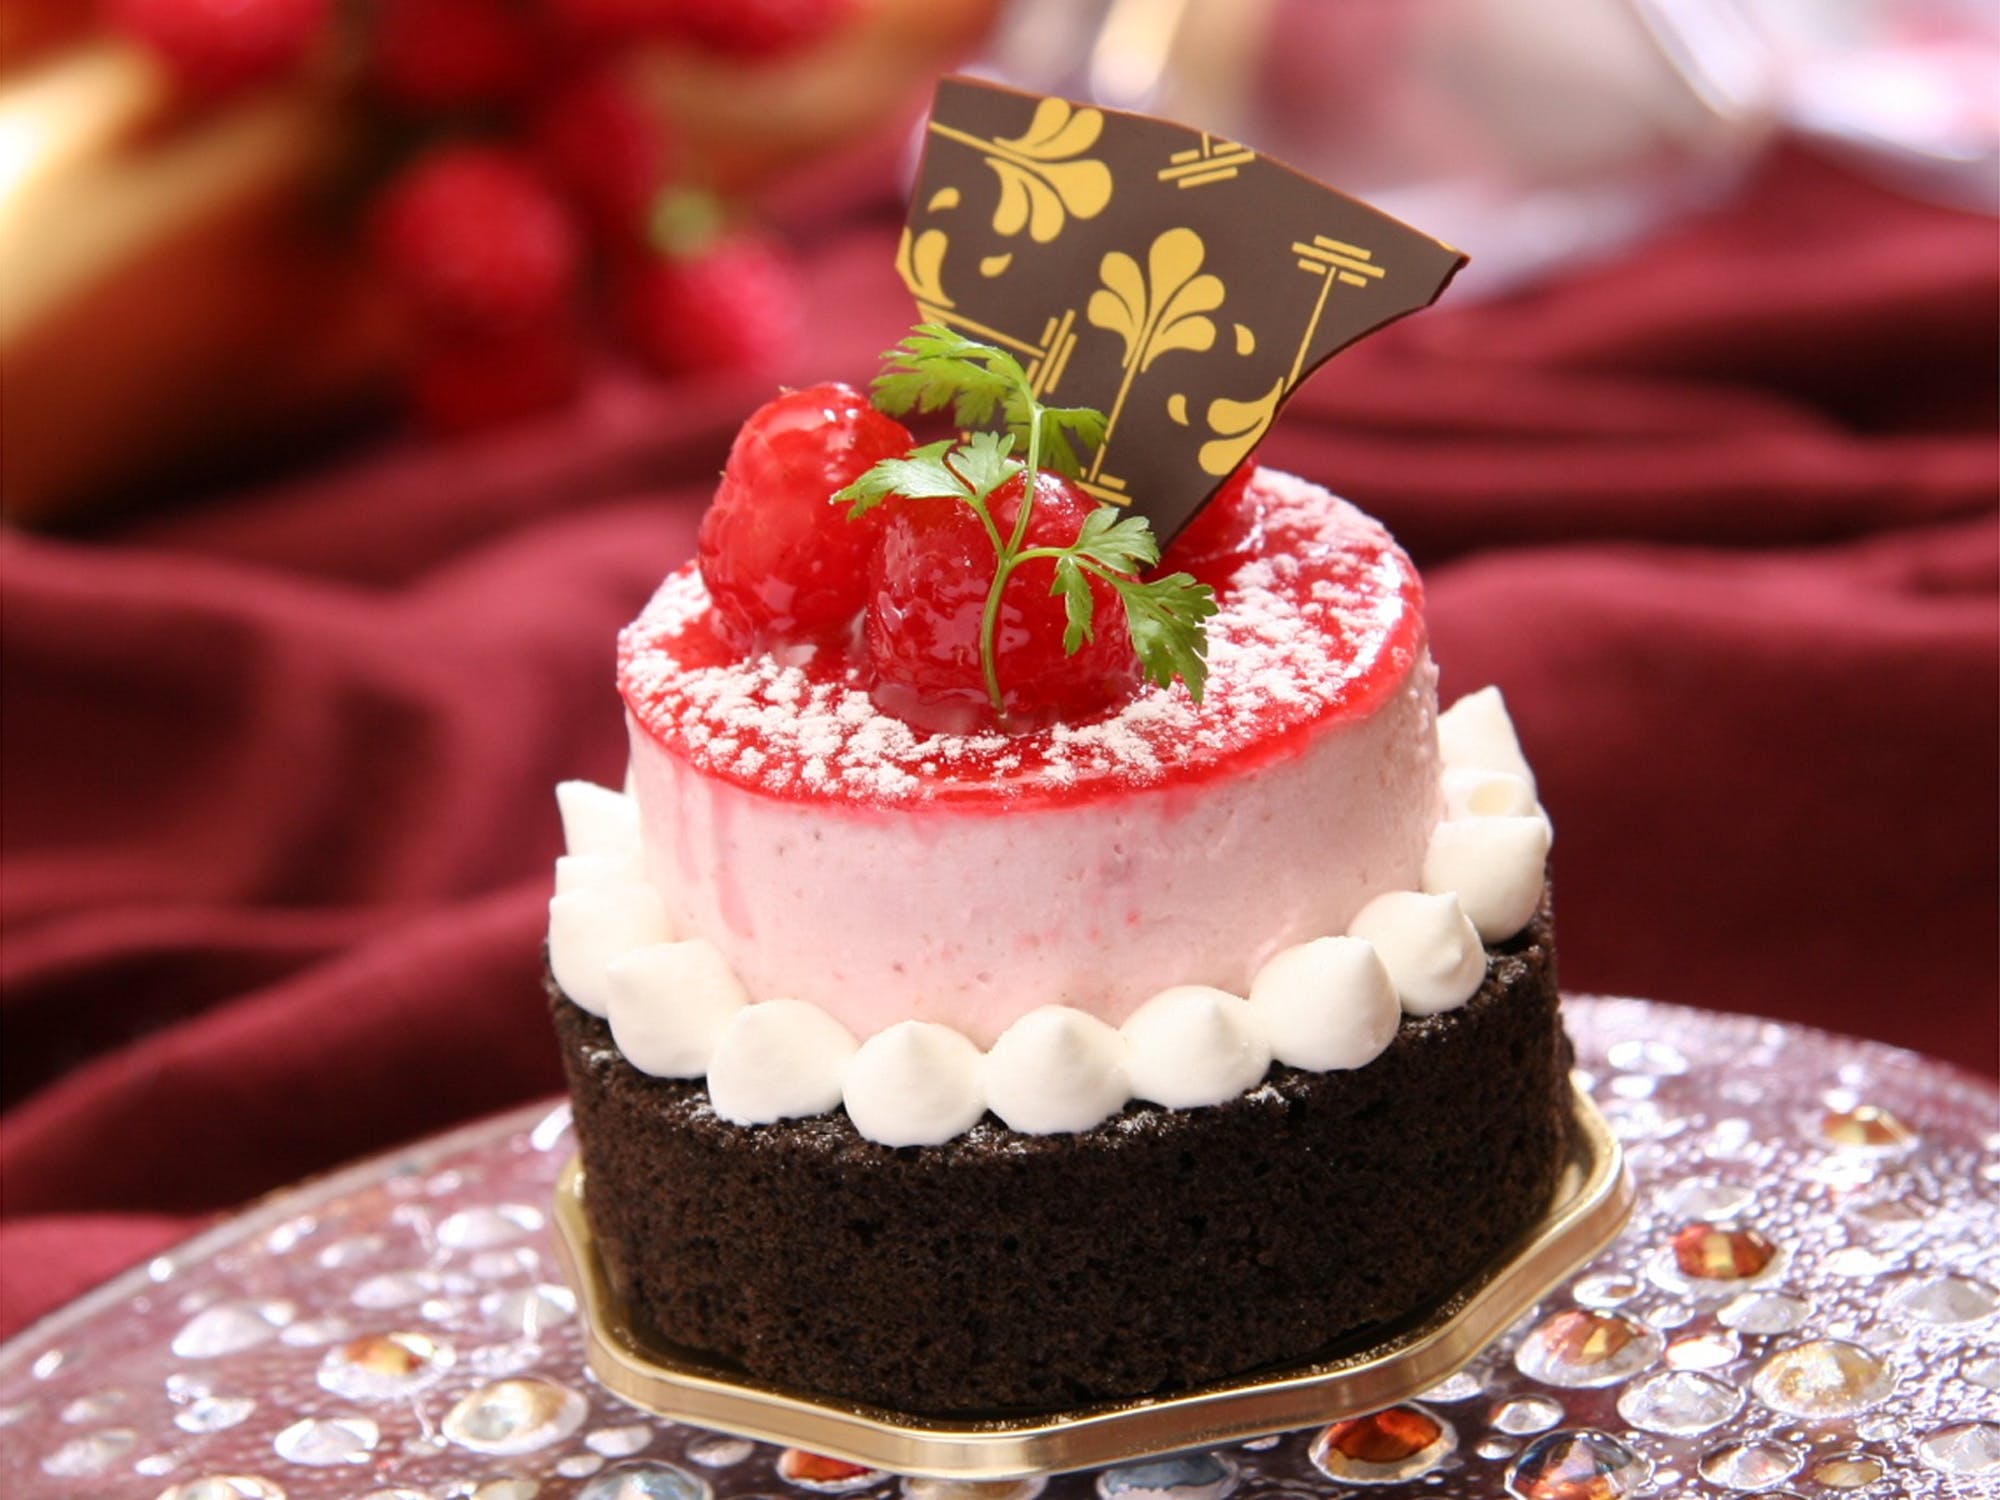
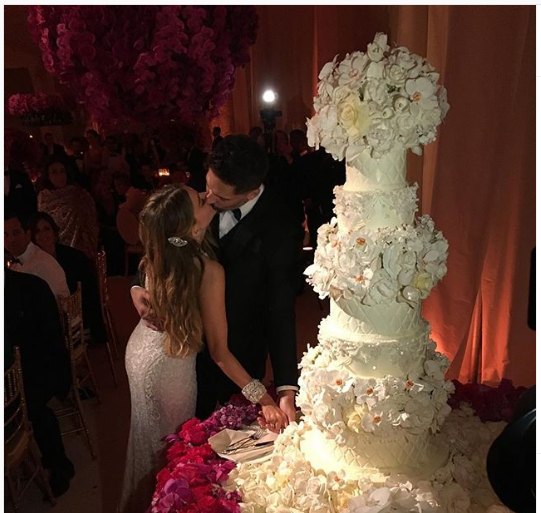
Remember Cruise and Holmes’s Italian wedding? The couple chose a five-tiered white chocolate mousse cake covered in marzipan roses. In the pic above, the multi-tiered wedding cake of Sofia Vergara & Joe Manganiello might leave you in a sense of awe.  If you are a naturalist, this kind of flower and petal design could be a great cake topper idea. Consumers and businesses alike appreciate professional food printers from IcingInks. They are extremely useful in creating awe-inspiring cake toppers.

3. Choose a flavourAppearance of the cake should complement the flavour. Your guests must leave the venue with a delicious memory of the wedding event. You may find different flavour choices like vanilla, raspberry mousse and vanilla buttercream, luscious lemon, grand marnier, hazelnut almond, ginger spice, chocolate, bananas foster, and more in the market. Take recommendations of family and friends to customize the cake with the right flavour.

4. Give attention to the nutritional valueThough wedding is a moment when most of the guests tend to break their weight loss or health resolution. You too can’t be an exception. LOL! it’s your responsibility to take care of their health while they are in for a treat. Prefer purchasing your wedding cake from a trusted professional confectioner who discloses the nutritional ingredients or calorific value. Make sure your baker uses FDA-compliant cake decoration edible supplies.

Wedding Cake Ideas

5. Consider the costLast but not least! It’s not the ingredients alone, but the complexity of design that makes a difference to the cake cost. Designing spiralling floral cascade as discussed in the above Sofia Vergara & Joe Manganiello wedding cake or something similar is a time-consuming task. The baker may charge extra for not-so-easy design. The cost also varies by the type of flavor you select. If you want to contain the cost, Icinginks can help you. Get quality edible supplies and unleash your creativity.

Hope the wedding cake selection ideas will help you find the best fit. Share your experience. Drop in more tips for picking out the perfect Insta-worthy wedding cake.

Original Source: Icinginks

How to Use Different Edible Markers for Cake & Cookie Designs

Cakes and cookies are the soul of most of the celebrations across the globe. Imagine going to a birthday party and there is good food, chilled beverages, but no cakes, cookies or confectionaries to be seen. The disappointment knows no bounds!

Since the time mankind has evolved to a considerable extent, celebrations for various achievements and events have been an integral part of life, and celebrating with cakes and confectionaries of an assortment of designs, flavors, and colors is a necessary if not mandatory addition. Therefore, it was just about time that the decorations on these cakes and cookies play an important part too.

Cake decoration is not a new thing; it has been around for decades and there have been cake decoration records, competitions, and exhibitions throughout the world. If you are someone who finds the art of cake decoration one of the most mesmerizing forms of art, chances are you love to decorate cakes and cookies by yourself. Whether you are a hobbyists or a professional baker, if cake decoration is where you find your true calling, edible markers have to be one of the most important tools for your work.

If you are in search of some of the most reliable and effective edible markers to decorate your cakes and cookies, look no further. Here are some of the most efficient and vibrant edible markers for cake and cookie decoration by Icinginks that will surely let your creativity channel through in a new and unique manner:

Icinginks Double Tip Edible Markers

Double Tip Edible Marker

These two-in-one edible markers are best for saving time and working fast. The Icinginks Double Tip Edible Markers come in 5 colors – Yellow, Black, Red, Green, and Blue. Each of these markers is attached with two types of tips – standard and fine.

The fine tip edible markers are ideal for contour drawing or doodling. The vivid colors are lively and provide a striking look to the cake or cookies. They also are perfect for making different shapes like circles, squares, triangles etc.

If you are looking forward to make colorful drawings of cartoon characters, objects, logos or symbols, the standard tip edible markers will get the job done for you. You can use them conveniently for filling up different shapes and drawings with vivid and vibrant colors.   

Icinginks Standard Tip Edible Markers

Standard Tip Edible Marker

These markers are for detailed drawing and coloring on cakes, cookies, and cupcakes. Whether it is a kids’ birthday cake, a graduation party cake, or picnic cookies, bring your creativity to delicious reality with these standard tip edible markers by making various cartoon characters or objects like cars and planes.

The Icinginks Standard Tip Edible Markers are available in an assortment of 5 colors – Yellow, Black, Red, Green, and Blue.

Icinginks Fine Tip Edible Markers

Fine Tip Edible Ink Marker

When it comes to make logos, symbols, or typographical decorations on cakes and cookies, the Icinginks Fine Tip Edible Markers are the best. They are easy to use and the edible ink flow is smooth, providing you with good control over the markers so that your drawings are clear and crisp.

The Fine Tip Edible Markers by Icinginks come in Yellow, Black, Red, Green, and Blue.

Everyone loves cakes and cookies made especially for them, and they love it more when their cake or cookies are decorated with their favorite design or with something they like. Make any kind of celebration memorable forever with these Icinginks Edible Markers.  

Why Using Edible Ink Cleaning Cartridges at Regular Intervals is Must

If you are the one who finds pure happiness in printing edible images to decorate cakes for your friends and family, or if you own a bakery and offer edible image cakes to your customers, you know how fun and pleasant the act of putting your creativity on the cakes and cookies can be. After all, watching your design getting adorned on a cake is one of the most thrilling feelings ever.

However, as fun and enjoyable it seems, there is always one issue that dreads most; the cleaning of printheads after regular intervals. No matter how often you use your edible ink printer, after a certain duration of time, it needs to be cleaned in order to maintain consistent ink flow and the quality of the prints.

Edible inks are made of several edible ingredients including FDA approved natural colors often extracted from fruits. While using the edible ink cartridges for printing, the ink tends to get smudged on the printhead of the printer, like normal ink. Also, if you are not using the printer for a few days, the ink nozzles might clot preventing the proper ink flow.

Also, when you start with your first edible ink venture and planning to use your regular printer of it, it needs a thorough cleansing because the regular inks are toxic and can be harmful to any extent if consumed. It is preferable to use a new printer for edible image printing, but if cleaned properly, an older one will do too.

That is when edible ink cleaning cartridges come into use. Several of the cleaning cartridges available at online stores like Icinginks consist of food-grade edible cleaning solution for thoroughly cleaning the printheads and removing any kinds of clogs. The edible cleaning ink also cleans the ink nozzles and ensures that the ink flow remains unobstructed.

Ink clogs usually occur when the edible ink printer is left idle for a prolonged duration of time due to which the water from the edible cartridges gets dried up leaving sugar deposits piled up in the printhead.  Besides it, regular printing operation also causes dust and dirt to settle in the printhead and blocks the uniform flow of ink.

The edible ink cleaning cartridges efficiently remove the clogs and clean the printheads from any blots. It is recommended to regularly use the cleaning cartridge after a few weeks of operation to ensure that your printer keeps printing longer and the printheads don’t need replacement. One pair of cleaning cartridges can clean the printheads for up to 20-30 times before they need to be replaced.

As for how to use cleaning cartridges, the best way to use the cleaning cartridges is after every project. Do not let the printer sit with the regular cartridges unused for more than a day. The ink will sit there, solidify, and then cause clogs which are a hassle to clean up.

After a project, remove the edible cartridges, put them back on the black clips that came with it, and store in zip lock bags while they are not in use. Insert the cleaning cartridges in the printer. Go to the LCD screen on the printer, Click Setup> go to maintenance > Click cleaning. Perform cleaning and once it’s done turn off the printer.

You can leave the cleaning cartridges in the printer until your next project, this will help maintain the life of the print heads and secure your investment.

Now when you are going to use the printer again for edible images, perform the cleaning again using cleaning feature from LCD screen for 2 times to make sure it’s very clean. Using a regular sheet of paper, print anything with the cleaning cartridges installed to see if most of the ink has faded. It won’t be perfect, but as long as most of the ink is out, it’s good to go. Take out cleaning cartridges and install edible cartridges for printing.

Original Source: Icinginks

Here’s How You Can Cut Fondant with Cricut in Easiest Steps

Being in the edible cake printing business as a professional or as a hobbyist requires certain kinds of tools to make work easier. One such tool is a Cricut machine that is quite a convenient tool to cut any design as per your liking.

The Cricut can be used to effectively cut icing sheets in various shapes and sizes with precision. All you need to do is make a few slight modifications in your Cricut machine and you are all set to cut fondant designs by yourself rather than spending on Cricut or Cricut cake. Don’t worry, these modifications can be easily reverted to use your Cricut machine for normal paper projects again.

First thing first, get rid of the rubber rollers. These are fixed at the bar steel near the blade. Apply some butter or oil the Cricut cutting mat to avoid the fondant becoming sticky. You can use the Cricut cake mat if you happen to possess a Cricut that is compatible with a 12”X12” mat. However, if you are using the regular Cricut cutting mat, remove the gluiness to avoid any contamination of fondant.

Cricut Machine
Cricut machine with Cricut mat

 Now comes the trickier part. You have to carefully apply the fondant on the cutting mat. Some caution needs to be taken regarding the correct thickness of the fondant. It should be thick enough for the blade to cut through it without causing any damage. If you find the fondant to be too thick, use a pasta maker to thin it down. The fondant with a thickness of 0.8″ approx. is usually ideal for the cutting.

Once applied, cut the desired designs using a sharp blade in order to ensure that the cuts are smooth. The pressure applied needs to be high so that the blade penetrates the thick fondant. The blade should be steady and firm while cutting to avoid any error in the design. When you are done with cutting designs, the fondants are ready to use.

Cricut Machine
The cuts made on fondant will be similar to these

 Please note that the Cricut machine works with various materials like papers, vinyl, fabric, foam, leather etc. and is not particularly designed for food preparation. Hence clean it properly before beginning the fondant cutting.

How to cut edible sheets with Cricut machineCutting edible sheets like frosting sheets and wafer papers with Cricut machine is quite easy too. You just have to adjust the paper size of the Cricut as its standard mat size is either 12”X12” or 12”X24”. Icinginks edible sheets come in the standard size of 8”X11” or 11”X17”.  To ensure that the sheets are properly aligned in the mat for cutting, place it at “Align Here” arrow. Place the mat with the arrow side towards the rollers of the Cricut and press “Load Paper.”

Edible Ink Printer
You can use Icinginks edible ink printer to take out the prints of shapes and designs on edible sheets that can be cut with the Cricut cutter later

If you don’t own a Cricut machine and don’t have any plans to buy it anytime soon, you can also use the standard Cricut cutters. Just use your Icinginks edible printer to print the edible images you want and use the cutter to cut the shapes and figures out of it. 

If you do not have a Cricut cutter, you can use shape cutters, scissors or any manual cutter. Icinginks also provide custom printing services. You can use Icinginks custom print services for custom printed frosting sheets and cutting service.

Original Source: Icinginks

A Guide to Removing the Edible Image from the Backing Paper

Edible image printing helps you personalize your celebrations asides from being great fun to indulge in. However, most people new to edible printing have trouble transferring the edible image onto their cake, cupcake or cookie. Frosting sheets, in particular, have a thin layer of frosting and a plastic/translucent backing paper behind them. This paper needs to be peeled off so that the image settles onto the food surface. This article attempts to explain the procedure to be followed when removing the edible image from its backing paper.

How is an Edible Image Printed?
An edible image is printed on special inkjet printers that use edible ink specially designed for printing. These are different from ordinary food dyes and must not be interchanged with the latter. An edible paper, typically, a frosting sheet, sugar sheet, rice sheet, fabric sheet or wafer paper. These sheets are inserted into the printer tray, just as you would ordinary printing paper. When you give the print command the printer nozzles spray ink in the desired pattern and your printed sheet comes out through the tray.

How to Remove the Edible Image from the Backing Paper
A high-quality frosting sheet from Icinginks is made of tapioca or cornstarch, with added sugar and gums. To apply the printed frosting sheet to the cake you must remove the backing paper beneath the printed side of the sheet. But before you attempt to do this you must ensure that the printed frosting/icing has dried and is hard enough to be peeled easily.

What Causes the Icing to Stick to the Backing Paper?
The factors that may result in the icing to stick to the baking paper are:
1The environment of the Room You are Baking In:
Humidity is the primary reason why the icing image gets stuck to the backing paper. In a moist room, the icing collects moisture, effectively ‘clinging’ to the backing sheet.
2. The thickness of the Icing:
The thinner the icing it is, the more fragile it is to remove. If you are regularly facing an issue peeling from the backing consulting a baking expert will help you through.

Simple hacks to peel off the edible icing from baking paper effortlessly
1. Table Edge Rescue:
 If the icing is starting to peel away as you bend the backing, use the edge of a table to help release it. An important thing to note is that you are trying to peel the backing away from the icing, and not the other way round since the icing is very delicate. Run the backing sheet back and forth over the table-top corner and you should see it starting to loosen.

2. Pop the frosting sheet in the freezer: This is one of the easiest ways to remove the icing from the baking paper. The humidity within a freezer is generally very low, and with the cold temperature the icing will harden up very quickly. Speed is very important to this procedure. You must apply the frozen frosting image to the cake seconds before it starts to return to its previous state. You can repeat this multiple times if necessary, and use the table technique to help ease away the icing if necessary.

Edible Icing Sheets

3. Fan oven: Another way to remove the icing is by placing it inside a warm fan oven for around 10 minutes (warm, not hot – you’re not trying to burn them off!). The heated air will slowly dry off the moisture holding the icing to its backing.

Fan oven - Edible Icing Sheet

4. Use a Hairdryer: If you don’t have a fan oven, turn over the icing sheet onto its backing on a clean and dry surface. Now use a hairdryer for aone minute or two so that the sheet dries out. With the impact a hairdryer creates, with warm air blown down onto the sheet, there is a risk that the icing will start to peel up and break.

Hairdryer - Edible Image on Icing Paper

5. Use Premium Baking Sheets: If you are working daily with edible images and encounter removal issues, it is worth investing in Prime Blank Frosting Sheet. These edible papers empower bakers with spontaneity and creativity. Place the frosting sheets in the edible printer just like normal paper, and print any desired image, using Icinginks edible ink. Once printed, make sure you let the frosting sheet dry for at least 6 – 12 minutes.

Icing Sheet or Wafer Paper – Which Edible Paper to Use and When?

Cakes make every occasion special, no surprise there, and if those cakes look good, it enhances your delight as well as the craving for them too. Whether it is the frosting, the decoration, the colors or certain shapes and figures, fancy, glitzy cakes have always been the show stoppers at all kinds of parties.

As you must have already known, there are numerous methods to decorate your cake. However, one of the popular decoration methods remains using edible images. Different kinds of edible images of shapes, sizes, and colors can be printed on edible papers.

Good quality edible sheets produce vivid and vibrant colors, which are as real as the original photograph. Icinginks offers some of the best edible sheets of all types that can be used for edible image printing.

Now the real question remains, which edible sheet to use and when? The edible papers are generally of two types – wafer papers and icing sheets (also known as frosting and sugar sheets). The texture and print effect are quite different as well as the usability and cost.
Here are a few tips that can help you decide which edible paper to choose:

Icing Sheets


Sheet texture:

When it comes to wafer papers, they are comparatively stiffer than the icing sheets as they are made of starch-based material (dehydrated potato starch, oil, and water).

Icing sheets are layers of icing pressed firmly on a backing paper. They are flexible than wafer papers and are less transparent. The frosting sheets are made of tapioca or cornstarch with additional sugar and gums.

Since icing sheets are more flexible, they are best suited for edible printing, though wafer papers can also be fed into the printer and printed.  

Print effect:
Wafer paper is translucent and dissolves immediately when in a liquid. Hence, the color of the image on it is slightly less vibrant and images are also a bit blurred. However, the images of certain shapes like butterflies and leaves can work well on wafer papers.

Icing papers, on the other hand, are specifically designed for printing edible images, hence undoubtedly their quality is much clearer and crisper than the wafer papers.Icing sheets are definitely the first choice for edible image printing, but the peculiar print effect of wafer papers makes them preferable for certain kinds of images.

Application:
Wafer paper doesn’t have any backing and can be applied directly to a cake or cookie surface. However, they have a tendency to curl when applied on wet icing. Also, the wafer paper doesn’t blend into the frosting and once the cake is decorated, the paper is clearly visible along with the image.
Icing Sheets come with peeling paper that is a bit difficult to separate from the paper, especially in a humid environment. However, if you succeed in peeling away the backing properly, the icing sheets can easily be applied to the cake surface as it blends seamlessly with it, leaving only the clear vivid image on the top.  

Though sugar sheets are a bit tricky to be removed from the backing, they are preferred over the wafer papers when it comes to applying them on the cakes because of their perfectly blending property.

Flavor:
Wafer paper is flavorless and dissolves immediately. It doesn’t affect the flavor of the cake at all. On the other hand, icing sheets are slightly sweet with a tinge of vanilla. However, the flavor is so vague that once applied to a cake, it doesn’t clash with the cake’s flavor at all.

Pricing:
Wafer paper cost in the range of $6.99 (25 sheets, 0.27 mm) to $34.50 (100 sheets, 0.60 mm) while icing sheets are in the range of $16.99 (12 sheets, 8.5”X11”) to $249.99 (240 sheets, 8.5”X11”).

The above mentioned factors will help you to make your pick for the best edible paper suited for your cake or cookie. So get going to and prepare for an awesome party!

5 Ways to Decorate Edible Icing Sheets Other Than Printing Images

Decorating cakes with edible icing sheets can produce some of the most amazing and beautiful cake art. Using different kinds of prints and making cutouts from them to enhance the appearance of your cake is always a good idea. However, do you know that there are so much more you can do with frosting sheets other than to print images on them?

Icing sheets are in all aspects like ordinary printer papers, except of course they are edible. Therefore, you have the liberty to make art on them with different kinds of edible mediums like edible colors, edible pens, edible markers, etc.

Creating art on sugar sheets gives a more handmade feel to the overall decoration and let you work on more intricate designs that might not be achieved to satisfaction when you print an image on them. Here are a few ways you can decorate icing sheets with manual methods:

Using Edible Markers

This is one of the easiest ways to draw on the icing sheets. All you need to do is to make the desired shapes and figures on the sheet with edible ink markers, cut out that shape or figure, and use it on the cake surface in the similar way you would paste a printed frosting sheet on the cake by peeling off the backing paper.

Using Food Colors

Get a new set of drawing brushes (all new), a few bottles of food colors and unleash the artist within you. Whether it is calligraphy, caricature, or any other kind of artwork, dip your brush in the food color and get going. The good quality food colors dry fast, hence, it is advisable to use the same for better results.

Adding Edible Pearls

One of the best things about frosting sheets is that they are compatible with several other edible items like for example, edible pearls. Once you are done with drawing your favorite cartoon characters on the icing sheet with edible pens or markers, decorate it with multicolor edible pearls. You can use edible glue to stick the pearls on the sheets in any pattern you want. It will surely enhance the look of your cake tenfold.

Sprinkle with Edible Glitters

You can use multicolored edible glitters to further enhance your artwork on the icing sheet. The glitters add depth to the drawing, making your cake look awesome than ever. The glitters can be stick to the paper with edible glue.

Airbrush and Color Sprays

Color Spray

Top the airbrush or color spray with your favorite edible color and sprinkle the sugar sheet with different shades. You can move the spray to give different depths to the artwork. These icing sheets are visually captivating.

When it comes to decorating a cake with edible icing sheets, the possibilities are numerous, and you can increase it tenfold by decorating the cake with pre-decorated frosting sheets.


Design a site like this with WordPress.com
Get started